Rear Speaker Mount Repair Part 1
Moderators: the2knights, Highway Rider
- Mr Jensee
- King of the Road
- Posts: 1987
- Joined: Fri Dec 26, 2008 5:55 pm
- 15
- Current bike(s): Phone 337-781-8158
Home Phone disconnected.
Previous bikes. Yamaha 180, Honda CM200T, Suzuki 1000LNKawasaki ZRX1100. - Location: Lafayette, La
- Has liked: 0
- Been liked: 9 times
Rear Speaker Mount Repair Part 1
I did this after I came back from a ride today and discovered the right rear speaker was being held on by only one rubber mount. I looked at the fix in the tech section and decided I had to try one of my own. Here is what I did.
I went to Lowes for the parts. Here is what was required.
3 1.5 inch 5/16" carriage bolts.
3 Rubber Well Nuts, 1/4-20. Found these in the hardware dept. in a drawer.
1 pack of stainless steel 1/4-20 Acorn Nuts. (these were the most expensive item)
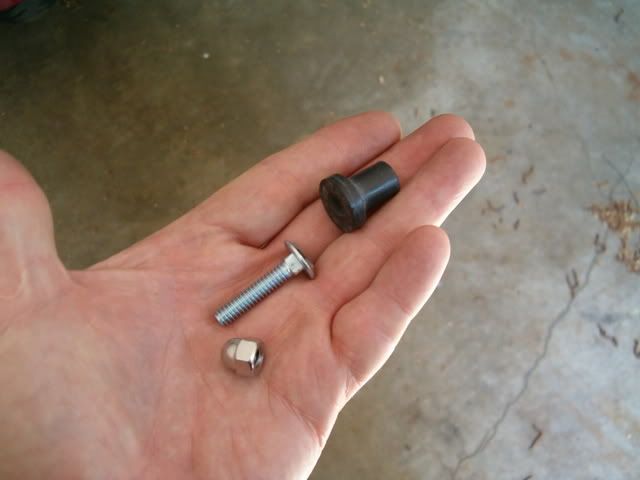
First I removed the rack from the trunk then removed the right speaker. I then unbolted the mounts from the base and separated the speaker base from the cabinet. I then cleaned he mounts using a bench wire wheel. I then drilled a hole the size of the diameter of the carriage bolt.
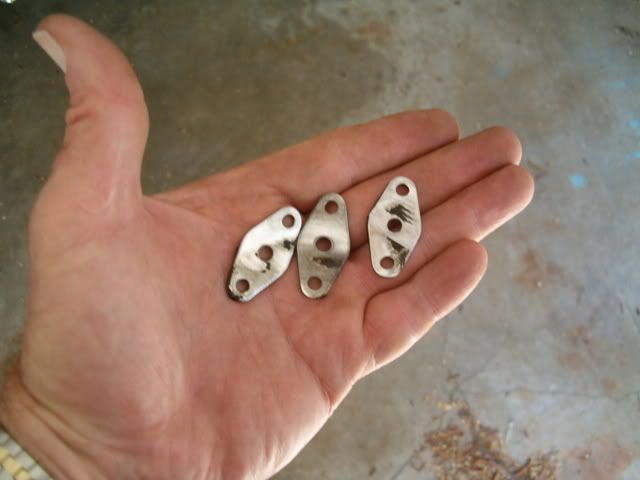
I then mounted the pieces and used them as templates to drill holes in the plastic base.
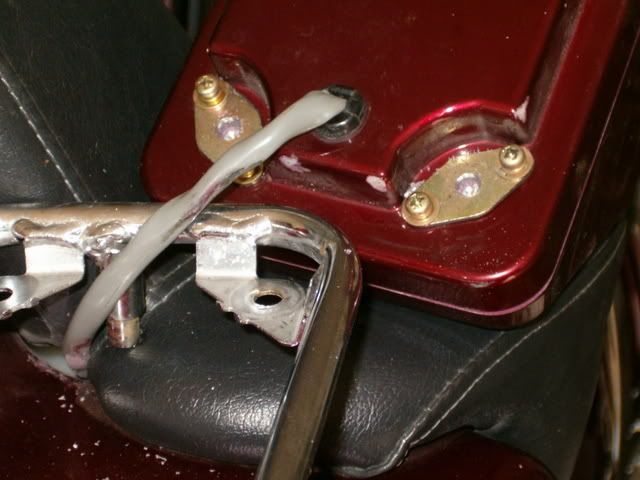
This is where it got interesting. The carriage bolt heads stuck up too high to allow the speakers to close once mounted so I took them back to the bench grinder and ground the heads down as thin as I could get them, about the thickness of a piece of cardboard.
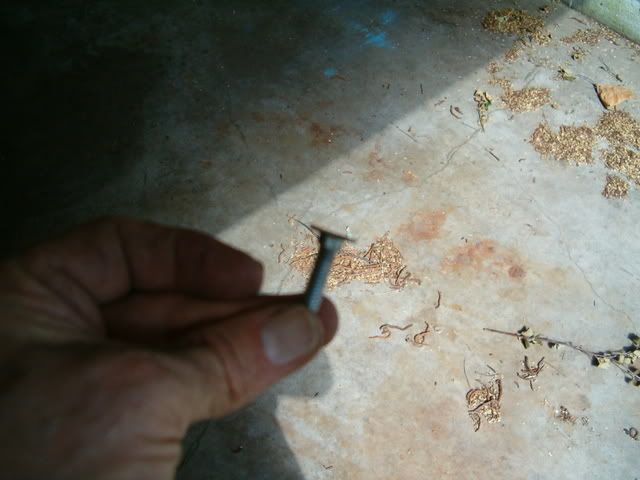
I then drilled out the hole in the plastic base just large enough to accomodate the square base under the head of the bolts.
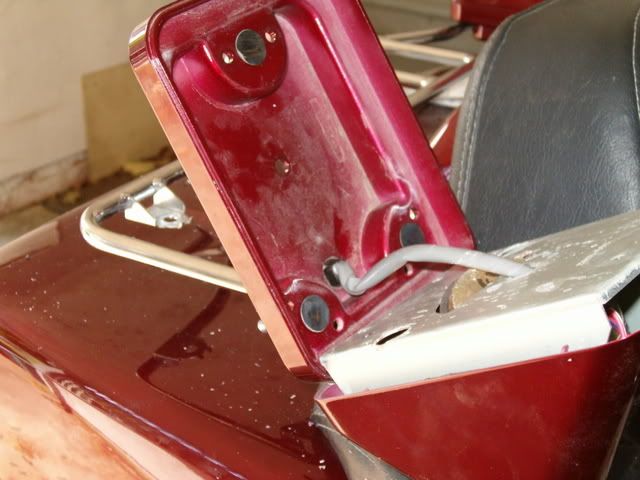
(continued in Part 2.)
For Voyager XII Manuals click the link below.
https://1drv.ms/f/s!Ao3K0Ai2gvglgS3l7J4pBJrjfBhc
- ghostler
- Grand Tourer
- Posts: 519
- Joined: Fri Jun 21, 2013 5:44 pm
- 11
- Current bike(s): 2001 Voyager XII, 1971 Honda CB100
Asphalt, the final frontier; these are the treks of the Kawasaki Voyager; its continuing mission to explore strange new roads, to seek out new sites, new bed & breakfasts, to boldly ride where no one has ridden before. - Location: Clovis, NM
- Has liked: 2 times
- Been liked: 10 times
- Contact:
Re: My Version of the Rear Speaker Mount Repair Part 1
That is one way to do, looks like a good methodology to consider for future, Mr Jensee.
Didn't find your post until after my repair.
Just repaired my right rear speaker. One of the previous owners repaired by gluing broken rubber and steel brackets together, installing a velcro strap as a safety restraint in case it broke again. 2 of the mounts repaired previously broke. I cleaned off the old glue then used Acetone to remove any surface contaminates on the surfaces to be glued. Then I glued the assembly together with 5 minute Epoxy. Where the rubber was starting to separate on the opposite bracket, I packed it with Epoxy using a toothpick. It's holding for now and I'll report back in a couple months to report how it held up riding.
George Hostler
Clovis, NM, US
Christian Motorcycle Association
Salvation Army Motorcycle Ministry, Western Territory
http://tsammcentral.org/
2001 Kawasaki ZG1200 Voyager XII
1971 Honda CB100
Clovis, NM, US
Christian Motorcycle Association
Salvation Army Motorcycle Ministry, Western Territory
http://tsammcentral.org/
2001 Kawasaki ZG1200 Voyager XII
1971 Honda CB100
- Mr Jensee
- King of the Road
- Posts: 1987
- Joined: Fri Dec 26, 2008 5:55 pm
- 15
- Current bike(s): Phone 337-781-8158
Home Phone disconnected.
Previous bikes. Yamaha 180, Honda CM200T, Suzuki 1000LNKawasaki ZRX1100. - Location: Lafayette, La
- Has liked: 0
- Been liked: 9 times
Re: My Version of the Rear Speaker Mount Repair Part 1
Isn't it neat how necessity can breed a lot of ingenuity! Let us know how it bears out. Mine are still holding, of course how could it fail with a bolt all the way through it?
For Voyager XII Manuals click the link below.
https://1drv.ms/f/s!Ao3K0Ai2gvglgS3l7J4pBJrjfBhc
- Furchin
- Cruiser
- Posts: 78
- Joined: Sun Feb 17, 2008 11:48 pm
- 16
- Location: Huntingdon County, PA
- Has liked: 0
- Been liked: 0
Re: My Version of the Rear Speaker Mount Repair Part 1
For those of you who are considering this mod or need repair of the mounts you can still get these mounts from Kawasaki for a relatively small price per unit. It makes things fairly simple without the time and effort of fabrication.
'87 Kawasaki Zl600 Eliminator-Red
'87 Kawasaki ZL1000 Eliminator-Black
'87 Kawasaki ZL1000 Eliminator-Pearl White
'87 Kawasaki ZL1000 Eliminator-Red
'96 Kawasaki Voyager
'87 Kawasaki ZL1000 Eliminator-Black
'87 Kawasaki ZL1000 Eliminator-Pearl White
'87 Kawasaki ZL1000 Eliminator-Red
'96 Kawasaki Voyager
- ghostler
- Grand Tourer
- Posts: 519
- Joined: Fri Jun 21, 2013 5:44 pm
- 11
- Current bike(s): 2001 Voyager XII, 1971 Honda CB100
Asphalt, the final frontier; these are the treks of the Kawasaki Voyager; its continuing mission to explore strange new roads, to seek out new sites, new bed & breakfasts, to boldly ride where no one has ridden before. - Location: Clovis, NM
- Has liked: 2 times
- Been liked: 10 times
- Contact:
Re: My Version of the Rear Speaker Mount Repair Part 1
True, replacement is an option, Ron Ayers has them for a touch over $4 apiece. However, I wanted to first see if I could repair them without the bother of cost plus shipping. Repair wasn't a time consuming issue.Furchin wrote:For those of you who are considering this mod or need repair of the mounts you can still get these mounts from Kawasaki for a relatively small price per unit. It makes things fairly simple without the time and effort of fabrication.
George Hostler
Clovis, NM, US
Christian Motorcycle Association
Salvation Army Motorcycle Ministry, Western Territory
http://tsammcentral.org/
2001 Kawasaki ZG1200 Voyager XII
1971 Honda CB100
Clovis, NM, US
Christian Motorcycle Association
Salvation Army Motorcycle Ministry, Western Territory
http://tsammcentral.org/
2001 Kawasaki ZG1200 Voyager XII
1971 Honda CB100
-
- Streetster
- Posts: 11
- Joined: Mon Jan 18, 2010 1:41 pm
- 14
- Current bike(s): 2002 Kawasaki Voyager
2-1987 Kawasaki ZL1000
2-1985 Kawasaki ZL900 Eliminators
1985 GL1200 Honda Goldwing - Has liked: 0
- Been liked: 0
Re: My Version of the Rear Speaker Mount Repair Part 1
I just got back from a 500 mile trip and had two of these mounts broken when I got back home. Not wanting to deal with this again anytime soon, I opted to buy all six of them new and replace them all at once and be done with that. If I can get another dozen years out of these new ones like the originals lasted for, I'll be happy with that.Furchin wrote:For those of you who are considering this mod or need repair of the mounts you can still get these mounts from Kawasaki for a relatively small price per unit. It makes things fairly simple without the time and effort of fabrication.
- ghostler
- Grand Tourer
- Posts: 519
- Joined: Fri Jun 21, 2013 5:44 pm
- 11
- Current bike(s): 2001 Voyager XII, 1971 Honda CB100
Asphalt, the final frontier; these are the treks of the Kawasaki Voyager; its continuing mission to explore strange new roads, to seek out new sites, new bed & breakfasts, to boldly ride where no one has ridden before. - Location: Clovis, NM
- Has liked: 2 times
- Been liked: 10 times
- Contact:
Re: My Version of the Rear Speaker Mount Repair Part 1
After putting several hundred miles of riding, so far my rear speaker rubber isolation mount repairs have held. I'm thinking what puts additional stress on these are items fastened to the package rack between the speakers, which touch the speakers.
Since the mounts only cost a tad over $4 US, $25 (Ron Ayers' price) for replacing all is not a bad price since they are still in stock. However, I get free shipping if I buy over $89 from him. Until I placed another order from him for $100 worth of items, the repair seems to be holding.
Previous repair done by one of the previous owners, the rear mount was still intact. Yet the mount was misglued 6 mm off center. I broke the previous glue joint, cleaned it up and re-glued it this time aligned properly.
George Hostler
Clovis, NM, US
Christian Motorcycle Association
Salvation Army Motorcycle Ministry, Western Territory
http://tsammcentral.org/
2001 Kawasaki ZG1200 Voyager XII
1971 Honda CB100
Clovis, NM, US
Christian Motorcycle Association
Salvation Army Motorcycle Ministry, Western Territory
http://tsammcentral.org/
2001 Kawasaki ZG1200 Voyager XII
1971 Honda CB100
-
- Streetster
- Posts: 11
- Joined: Sat Feb 11, 2017 3:38 am
- 7
- Current bike(s): 1999 Voyager XII
- Has liked: 0
- Been liked: 0
Re: My Version of the Rear Speaker Mount Repair Part 1
Does anyone have the part number for the oem mounts?
I couldn't find them on bike bandit... or perhaps someone still has a link?
Thanks!!
Skip
I couldn't find them on bike bandit... or perhaps someone still has a link?
Thanks!!
Skip
- Mr Jensee
- King of the Road
- Posts: 1987
- Joined: Fri Dec 26, 2008 5:55 pm
- 15
- Current bike(s): Phone 337-781-8158
Home Phone disconnected.
Previous bikes. Yamaha 180, Honda CM200T, Suzuki 1000LNKawasaki ZRX1100. - Location: Lafayette, La
- Has liked: 0
- Been liked: 9 times
Re: Rear Speaker Mount Repair Part 1
Found Part 1 !
For Voyager XII Manuals click the link below.
https://1drv.ms/f/s!Ao3K0Ai2gvglgS3l7J4pBJrjfBhc